This guide walks you through installing Hermes Agent, connecting it to GMI Cloud as your model provider, and setting up Telegram so you can chat with your agent from your phone. What you will need:Documentation Index
Fetch the complete documentation index at: https://docs.gmicloud.ai/llms.txt
Use this file to discover all available pages before exploring further.
- A Mac or Linux machine (or a VPS)
- A GMI Cloud account: https://console.gmicloud.ai
- A Telegram account: https://telegram.org
- About 10 minutes
Watch the Video
If you prefer to follow along visually, the full setup is recorded below.Step 1: Install Hermes Agent
Open your terminal and run the one-line installer.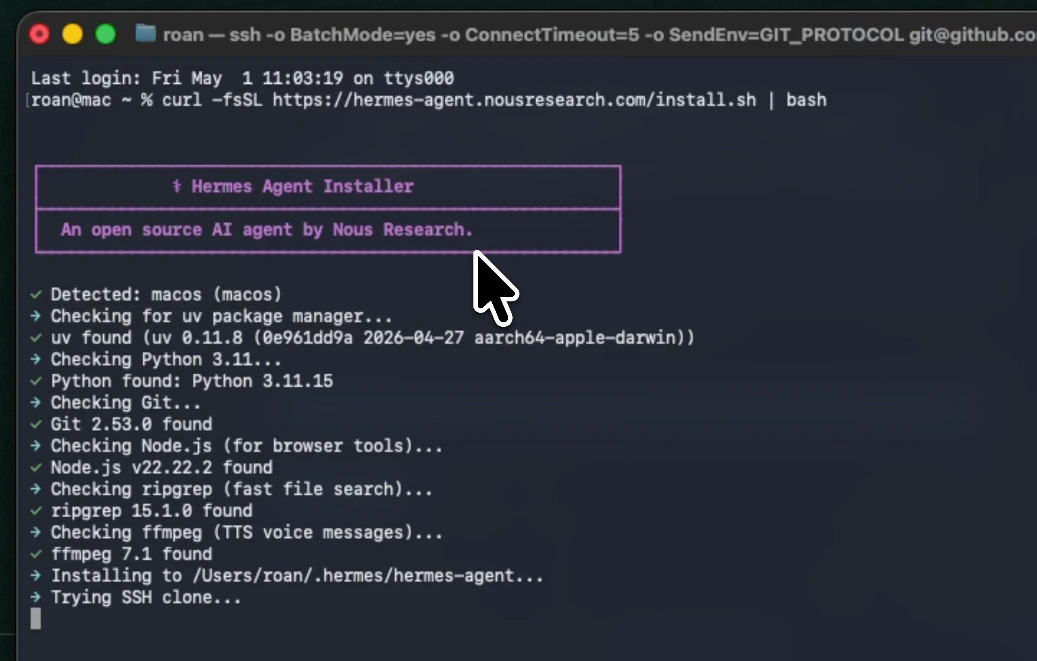
Step 2: Run the Setup Wizard
Start the configuration wizard:Step 3: Select GMI Cloud as Your Provider
When the wizard asks you to select a provider, scroll down and choose GMI Cloud.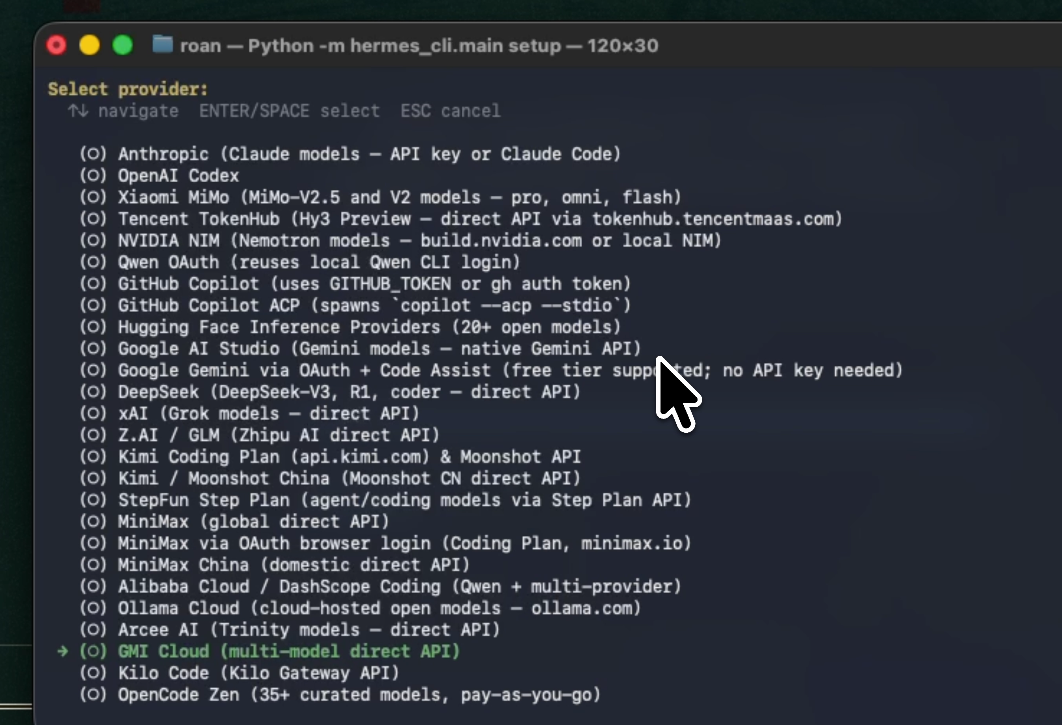
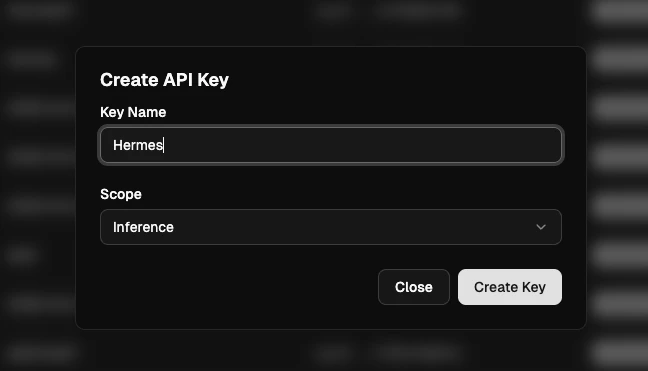
Step 4: Get Your GMI Cloud API Key
Go to: https://console.gmicloud.ai/user-setting/api-keys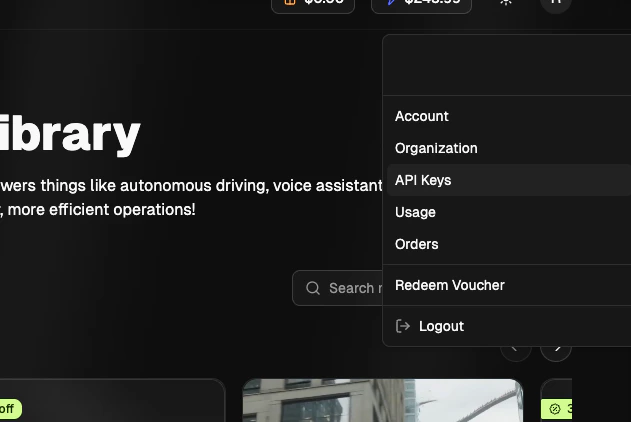
hermes-01, and copy the key.
Step 5: Set the Base URL
After the API key, the wizard will ask for a base URL. You do not need to change anything here. Just press Enter to use the default GMI Cloud endpoint:Step 6: Select Your Model
GMI Cloud gives you access to a wide range of models. During setup, you can pick the one you want to use. If you are not sure, a strong general-purpose choice is one of the Claude or DeepSeek models available in your GMI account.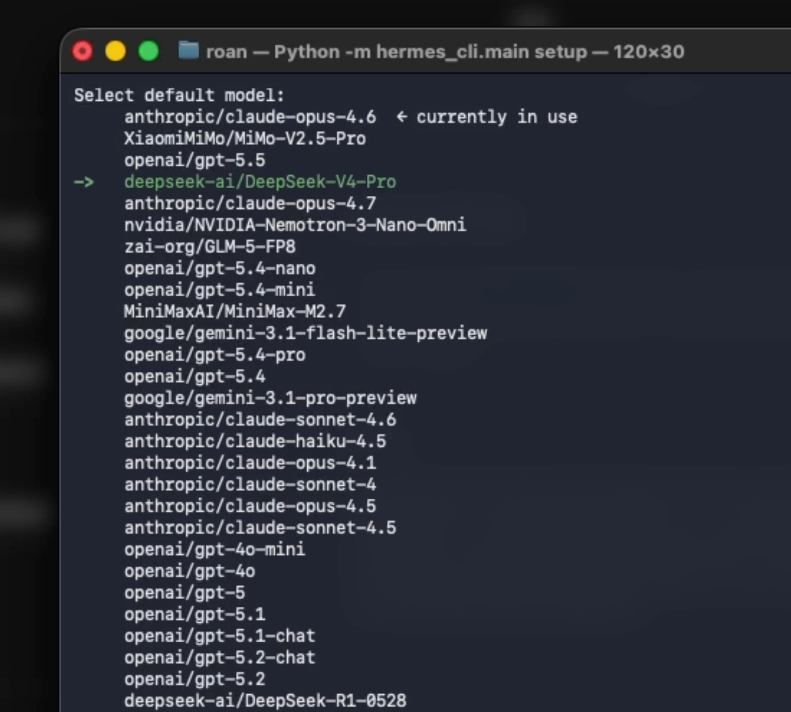
~/.hermes/config.yaml:
Step 7: Choose Telegram as Your Messaging Platform
When the wizard asks which messaging platform to use, select Telegram.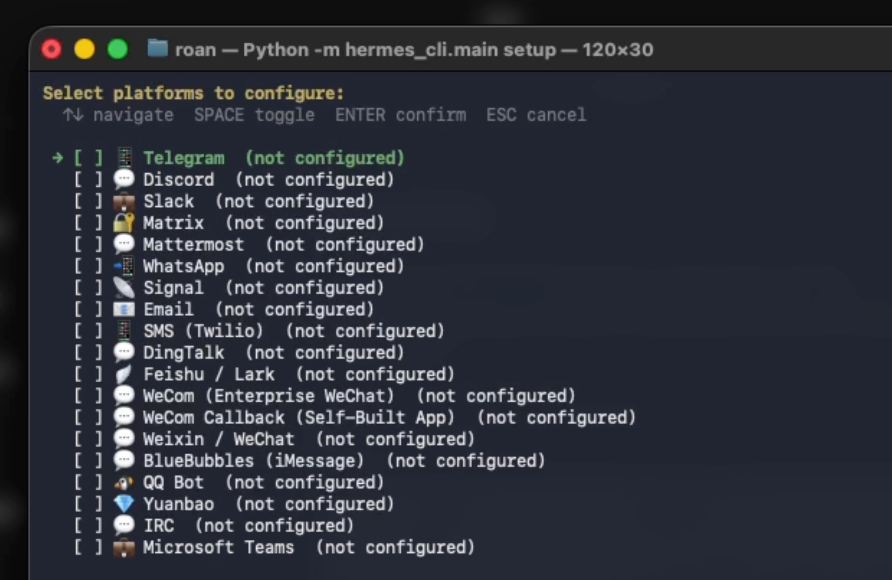
Step 8: Create a Telegram Bot
Go to Telegram and open a chat with @BotFather: https://t.me/BotFather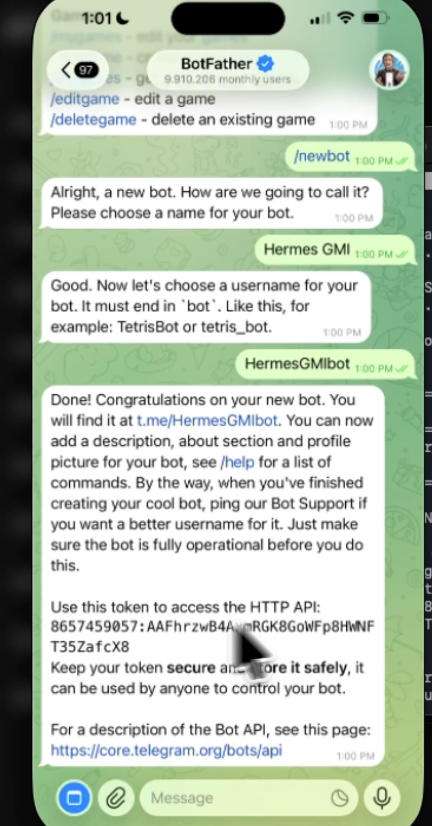
Step 9: Configure Your Telegram Settings
Open your Hermes environment file:# from the front of each line if they are commented out:
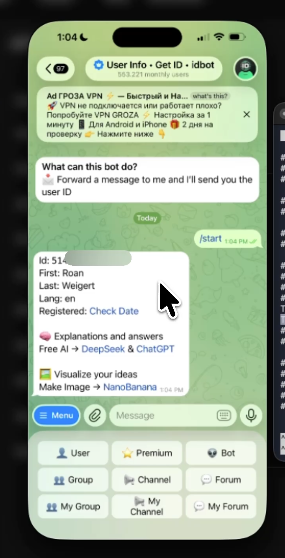
TELEGRAM_ALLOWED_USERS value.
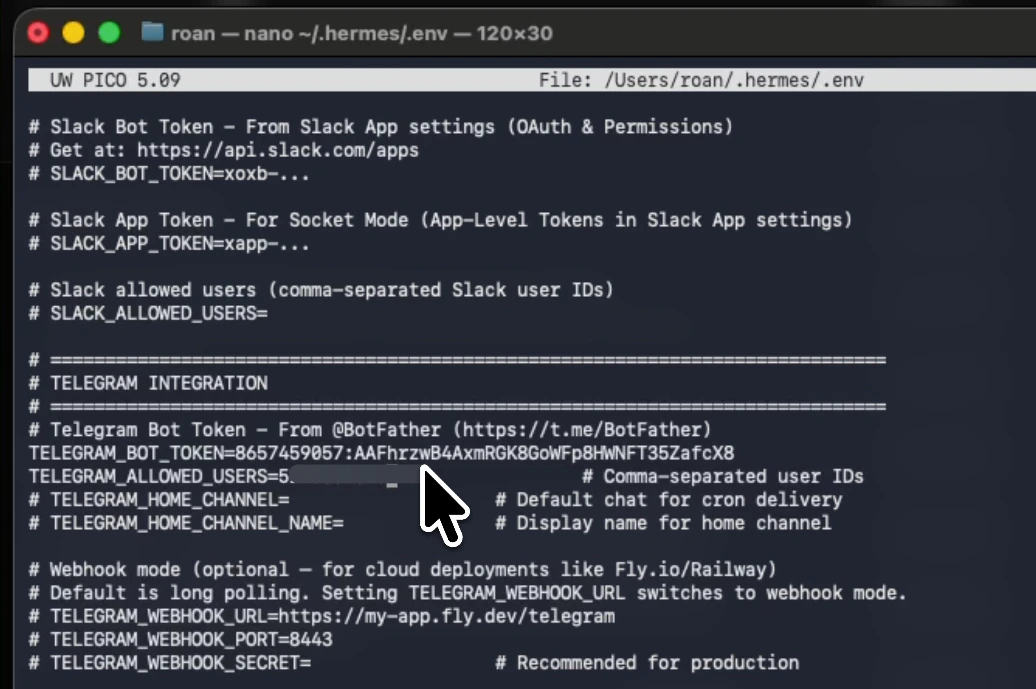
Ctrl+O, then exit with Ctrl+X.
Step 10: Start the Gateway
Start the Hermes gateway so your agent can receive messages from Telegram: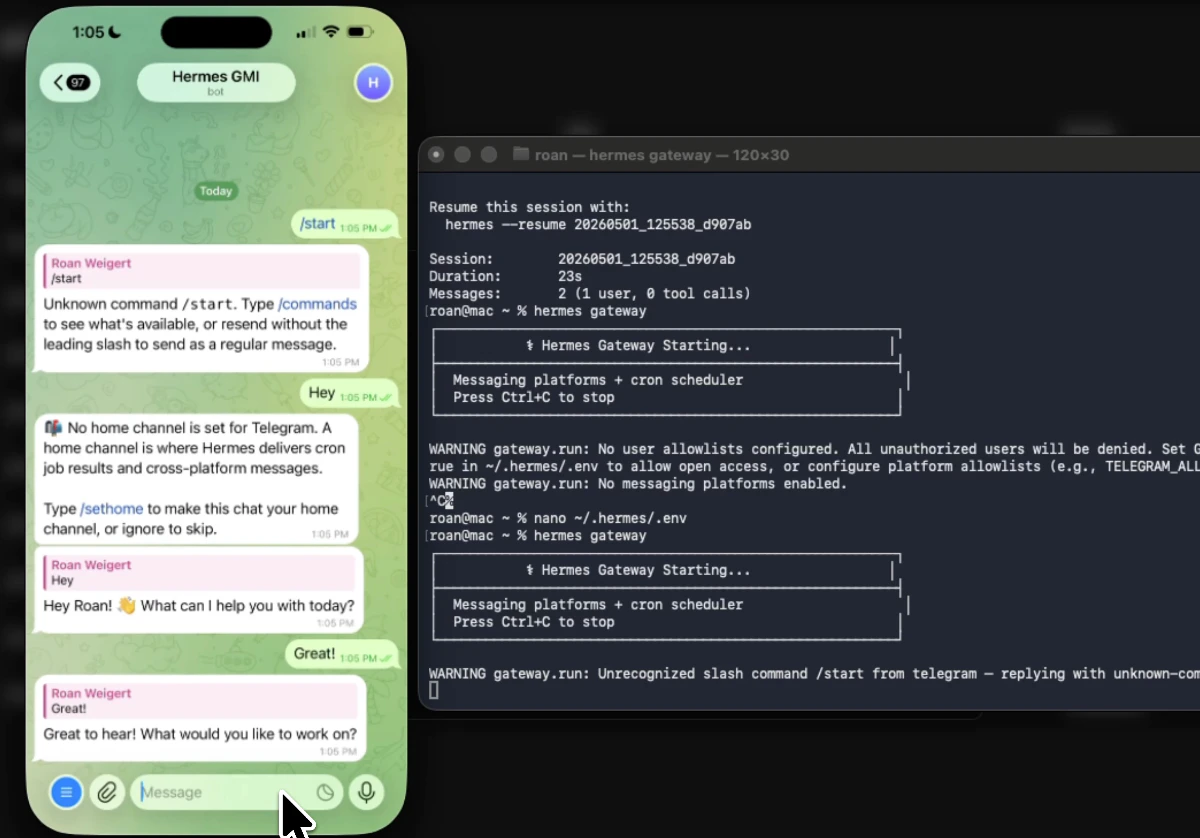
Step 11: Send Your First Message
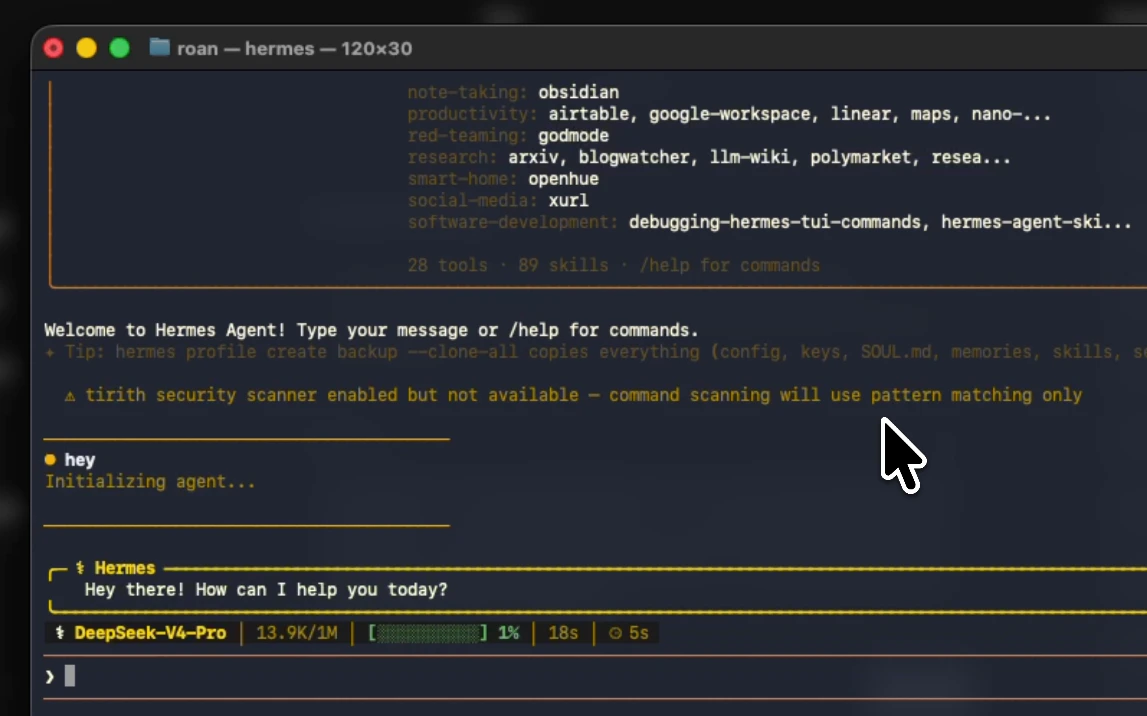
Open Telegram and search for your bot by the username you created in BotFather. Click Start. Send it a message. You should get a response within a few seconds.Step 12: Try a Real Task
Here is an example to see the self-improving skill system in action. Send your bot this message:Troubleshooting
Gateway shows “No messaging platforms enabled” This means yourTELEGRAM_BOT_TOKEN is missing or commented out in ~/.hermes/.env. Open the file and make sure the line does not start with a # and that the token is pasted correctly.
API key rejected (401 error)
Run hermes setup again to re-enter your GMI Cloud API key. Double-check that you have added credits to your GMI account at https://console.gmicloud.ai before generating the key.
Hermes crashes on launch with an OSError
This usually means Hermes is being launched from a non-standard terminal, such as VS Code’s integrated terminal. Try running it from a plain Terminal window instead.
Wrong API key or want to change it
Edit ~/.hermes/.env directly and update the GMI_API_KEY value, or run hermes setup to go through the wizard again.