

Register, launch, publish: three separate things
Who pays when a user shows up
When a user deploys your agent through Agentbox, the user pays for their own instance runtime and any model inference tokens they consume. You pay nothing for their usage. You only pay when you provision instances yourself for testing or development.The order that saves you trouble
Register first, then test the live endpoint, then publish. Skipping registration and going straight to listing creates a listing with no deployable backend, which confuses users and hurts your credibility.Choosing your path first
Before you begin
You need:- A working agent application that listens on an HTTP port
- A Docker image containing your agent
- The image pushed to a container registry that GMI can access
Why a Docker image
GMI Agentbox runs your agent as a container. A Docker image packages your code, runtime, and dependencies into a single deployable unit. This means your agent runs the same way on GMI as it does on your machine.What your image must do
Your Docker image must:- Expose an HTTP server on a known port (default: 8080)
- Respond to health checks on that port
- Accept requests and return responses within the gateway timeout (see Handle long-running requests for longer tasks)
- Read MaaS connection details from environment variables (see below)
Getting your image into a registry
Build and push your image to a registry:Configure the GMI MaaS endpoint in your image
Before you wrap your agent into an image, read the GMI MaaS connection details from these environment variables. At runtime, GMI injects the API key for the models you select in Step 2, so you never ship a key inside your image.
Read these variables in your code rather than hardcoding values, for example:
Leave
GMI_MAAS_API_KEY unset in your image — GMI injects it at runtime when MaaS integration is enabled (Step 2). Hardcoding a key is unnecessary and will be overridden.Wizard steps
- Basics & Template
- Infrastructure
- Networking
- Env Variables
- Review & Register
Step 1: Basics & Template
Identity for the listing. This is what users see on the catalog card and detail page.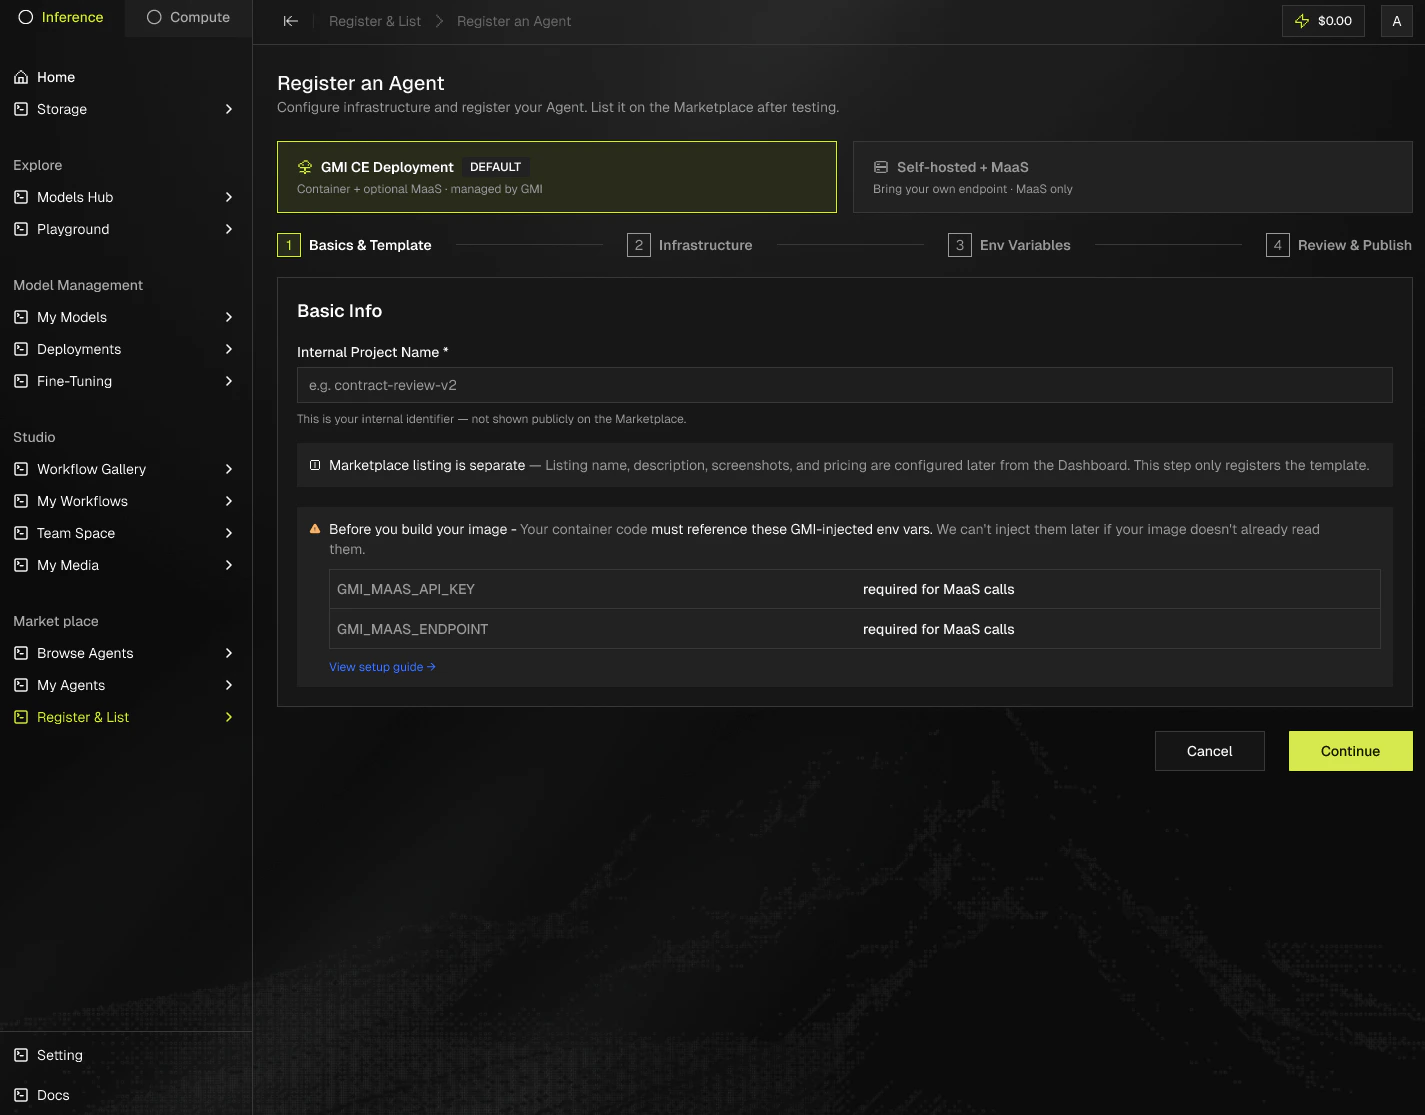
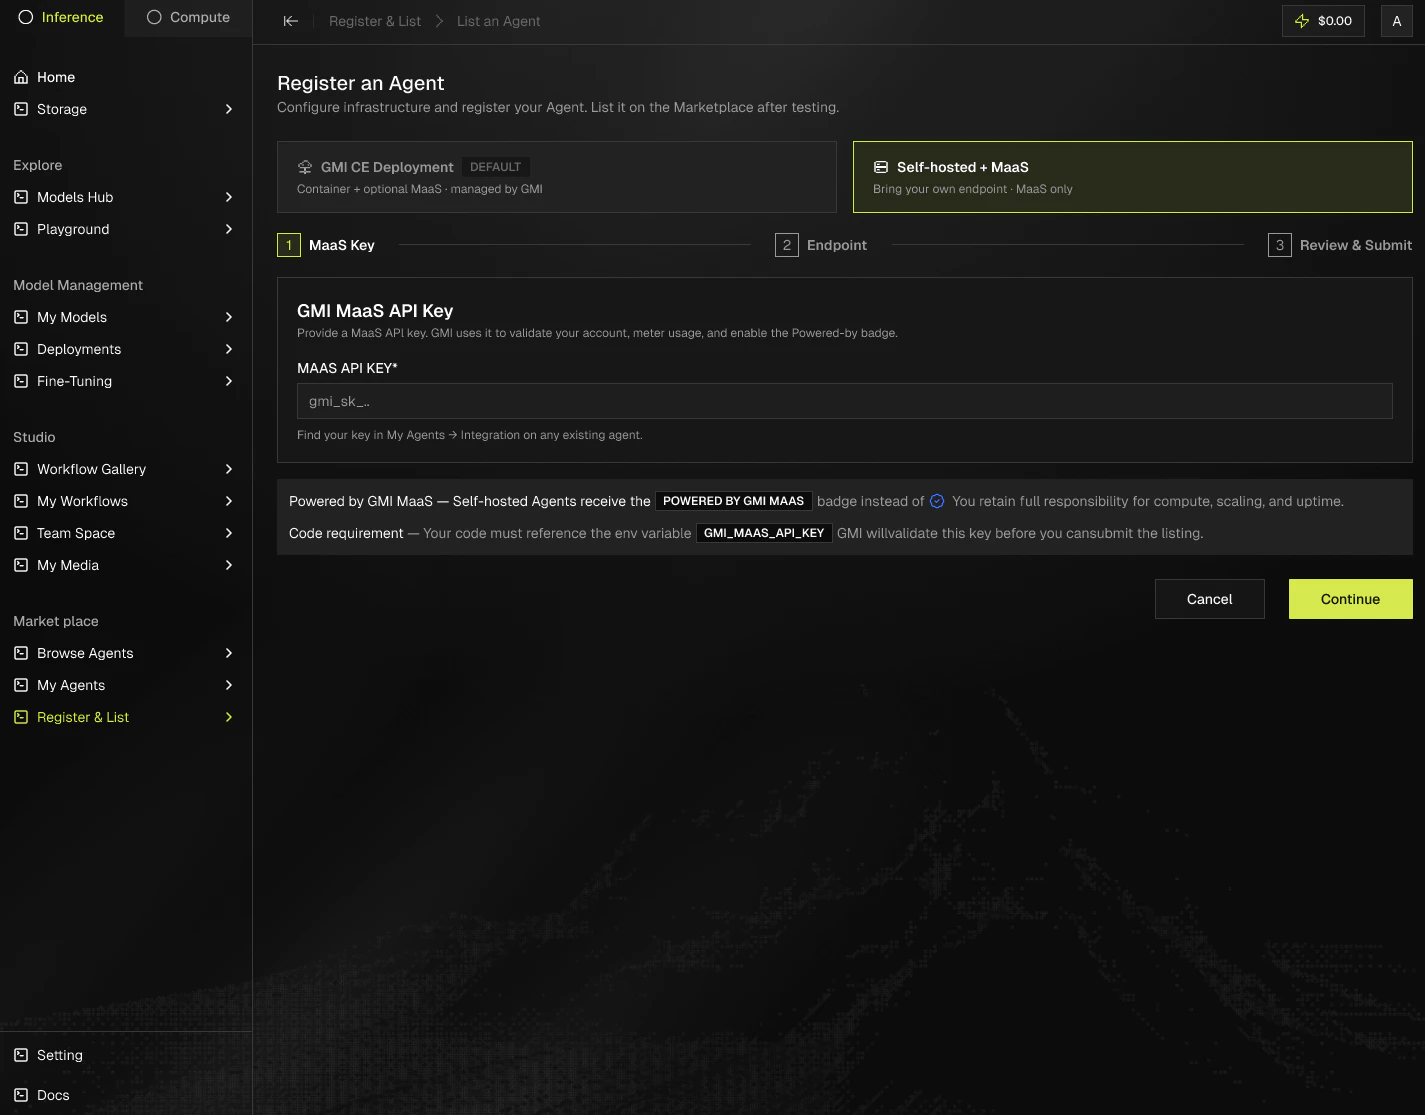
- Add the internal project name
Step 2: Infrastructure
Configure compute resources. GMI Infrastructure provisions containers on demand.Docker image source
- Registry URL. Pull from Docker Hub, GHCR, or any public/private registry.
- Upload Image. Push a local image directly to GMI’s registry. Useful for one-off builds.
Registry URL
- Format: registry.hub.docker.com/your-org/your-agent:latest
Enable Credentials
Turn on Enable Credentials if your Docker registry requires authentication to pull images. The toggle reveals two fields inline, entered here in Step 2 (not as Env Variables):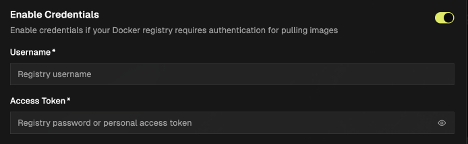
- Username — your registry username.
- Access Token — your registry password or personal access token.
Compute tier
- Container — 2 vCPU · 4 GB RAM · Ephemeral Storage 10 GiB · Data Storage 30 GiB. Additional tiers coming soon.
Region
- Currently available: IOWA IDC-1 (US-IA, US). Additional regions are being added.
- Pick the region closest to your users to minimize latency.
- Multi-region rollouts require a separate deploy per region.
MaaS integration
- Toggle on to give your agent access to GMI’s 200+ frontier models.
- GMI injects a MaaS API key into your container at startup, no key management on your end.
- Select every model your agent may call. Selection is editable later.
- Required for the Verified badge.
Step 3: Networking
Expose the ports your agent listens on. GMI CE routes external traffic to these container ports.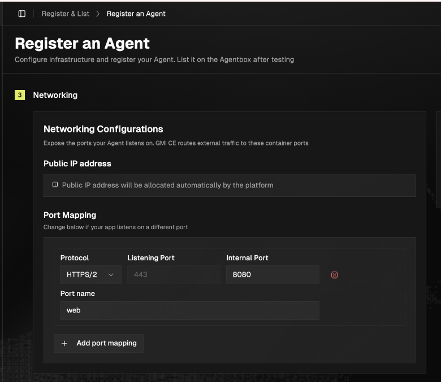
Public IP address
- A public IP address is allocated automatically by the platform. No manual setup required.
Port Mapping
Change these if your app listens on a different port. Each mapping has:- Protocol — for example HTTPS/2.
- Listening Port — the external port GMI exposes.
- Internal Port — the port your container listens on.
- Port name — a label for the mapping.
web. Use Add port mapping to expose additional ports, or the remove control to delete one.
Step 4: Env Variables
Runtime configuration injected into your container at startup.Auto-Injected by GMI
GMI injects these MaaS connection variables automatically. They are locked and cannot be overridden:GMI_MAAS_API_KEY— the MaaS API key, injected at runtime.GMI_MAAS_BASE_URL— the OpenAI-compatible MaaS base URL.
Custom Variables
Add your own variables. Each row has a Type:Secrets are encrypted at rest with AES-256. Plaintext values are never written to logs or audit history.
Per-region overrides
- Override values per region for staged rollouts or region-specific endpoints.
- Only available when the agent is deployed to more than one region.
Step 5: Review & Register
Confirm settings, register, and verify before submitting the listing.Review screen
- Every setting from the previous steps is summarized on one page.
- Click any section to jump back and edit.
Register
- Once registered, GMI Agentbox pulls the image and builds the container on demand. Users can then call the endpoint to start or stop the instance — billing runs only for the duration the container is active.
- The endpoint provided is used for container CRUD.
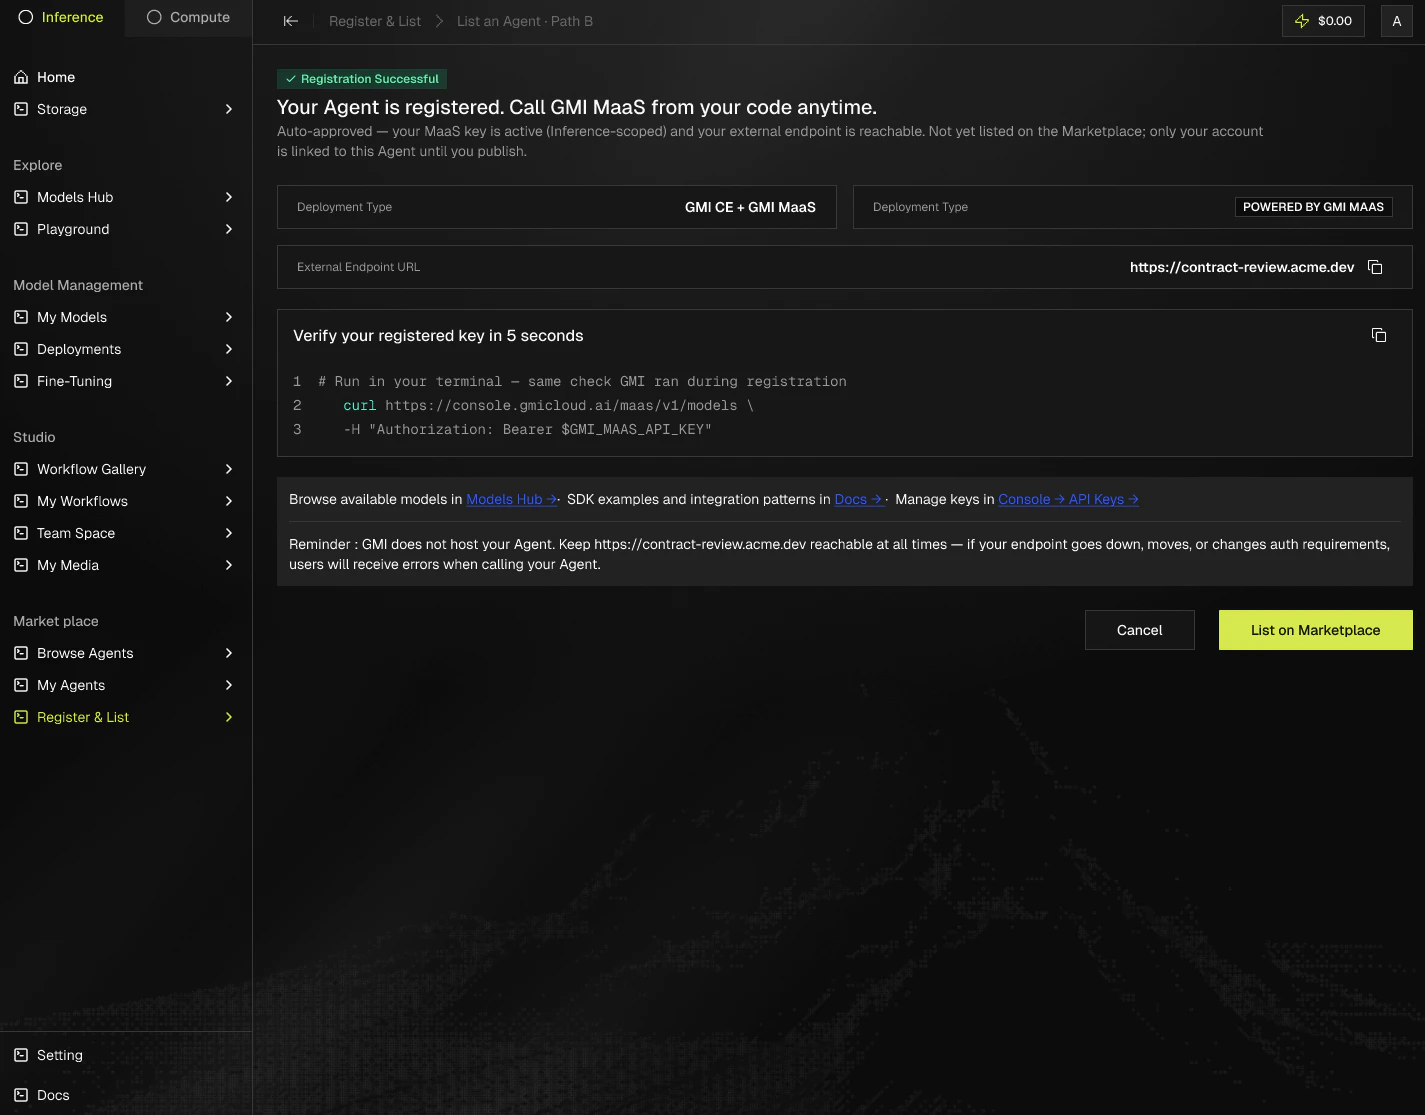
- Hit the URL with a sample request. Confirm latency, output, and error handling.
- Iterate by re-registering. URLs stay stable across updates.
Self-hosted + MaaS (Path B)
You host the agent yourself and call GMI Models-as-a-Service for inference. Lists with the Powered by GMI MaaS badge. On this path you don’t go through the full register wizard above. Instead, Connect your agent is a short 3-step flow:- Basic — project name
- MaaS Key — generate or connect a GMI MaaS API key
- Endpoint — provide your public-facing URL
Step 4 · Review & Submit
After entering your endpoint, review the connection details and submit. GMI validates the endpoint is reachable and the MaaS key is active. Once validated, your self-hosted agent is connected and appears in your My Agents dashboard.Managing your deployment
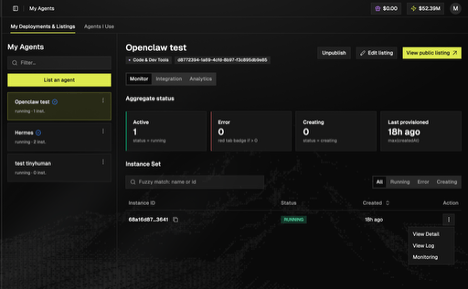
Once your agent is registered and deployed, the My Agents dashboard (under My Deployments & Listings) shows every agent you’ve published. Select an agent to open its panel, which has three tabs — Monitor, Integration, and Analytics — and three actions at the top right:- Unpublish — remove the listing from the Marketplace.
- Edit listing — update the public listing fields.
- View public listing — open the live Marketplace page for the agent.
Monitor tab
- Aggregate status — live counts for Active, Error, and Creating instances, plus the Last provisioned timestamp.
- Instance Set — a searchable table of every instance with All / Running / Error / Creating filter tabs and columns for Instance ID, Status, Created, and Action (View Detail, View Log, Monitoring).
Integration tab
The Integration tab gives you the Template ID (a UUID, with a copy button) and the full instance lifecycle as a 4-stepcurl workflow: provision → list tasks → poll → terminate. Replace <YOUR_API_TOKEN> with a token from your GMI account settings, and <YOUR_TEMPLATE_ID> with the Template ID shown at the top of the tab.
Analytics tab
- Usage By Model — a usage chart with a 1D / 7D / 30D / 90D time-range switcher.
- API Key Management — a table of keys showing key name, masked value, scope, and owner ID.
- View billing — a link through to your billing details.
Launching an instance
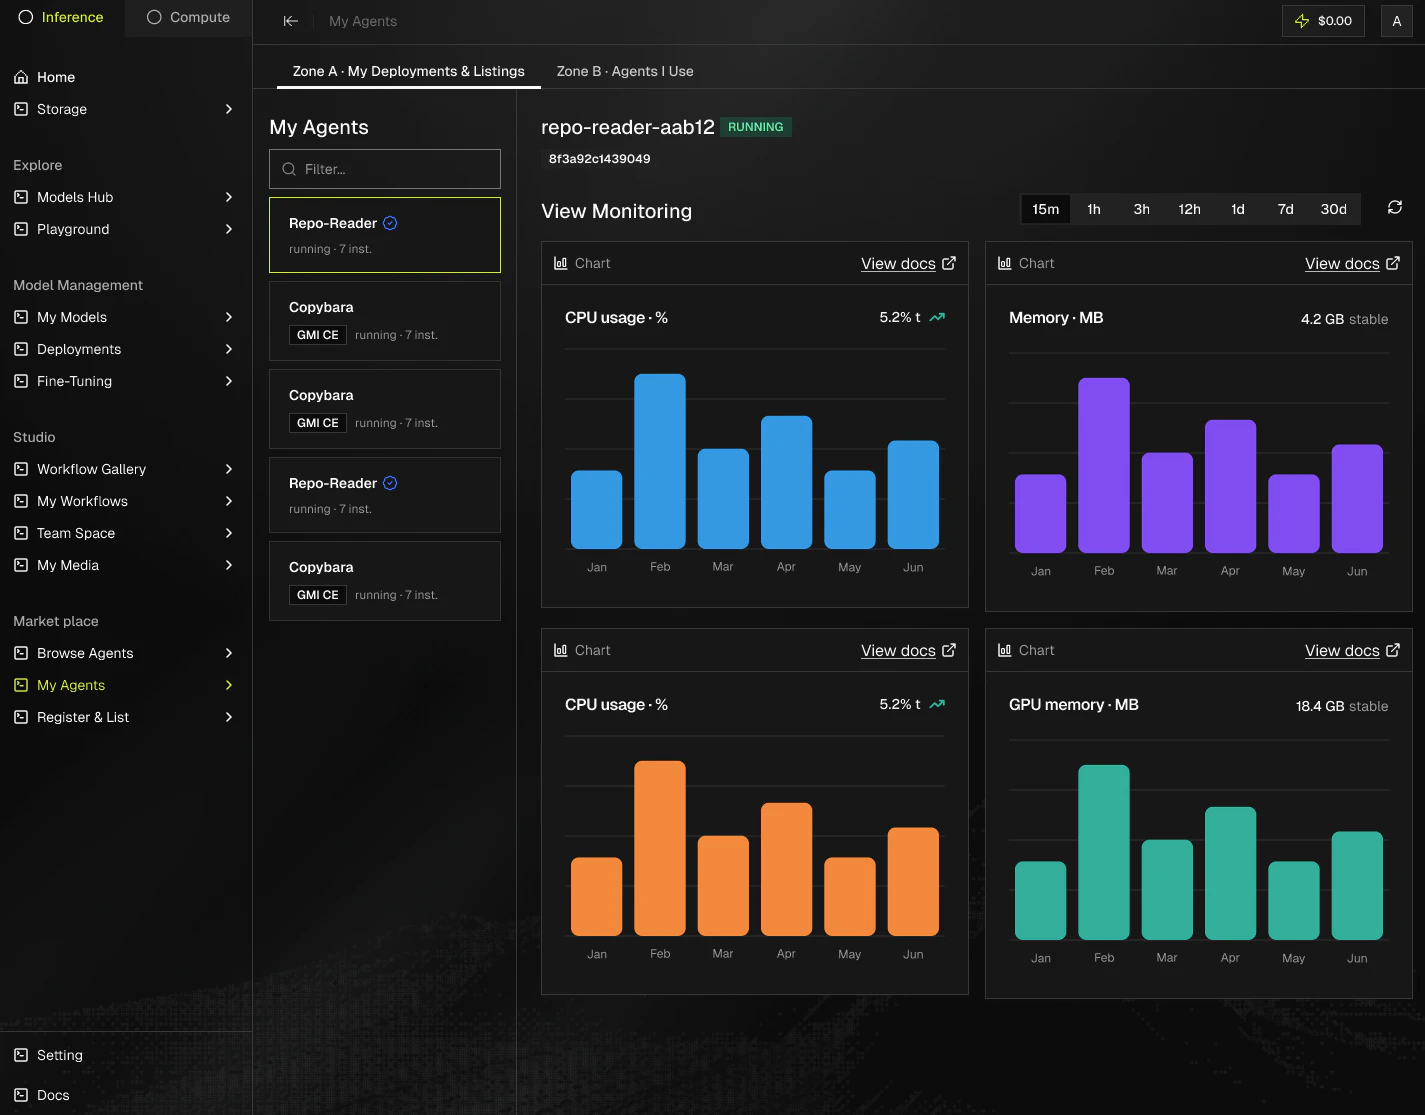
From the Monitor tab, click Launch to provision a new instance of your agent. The instance spins up in the region you selected during registration and gets its own public URL. Billing starts when the instance reaches Running status and stops when you terminate it.Authentication-key matrix
Publishing state
Next
- When the endpoint is ready, continue to List an agent to submit it for review.